Onboarding, screen by screen
Guide
This is the whole first run on Hobby, one screen at a time: an account, a workspace, GitHub, one indexed repository, a search, an agent key, and the first finding an agent proposes. The screens come from a new account, Ada Lovelace, connected to a small public repository. Getting started says the same in fewer words.
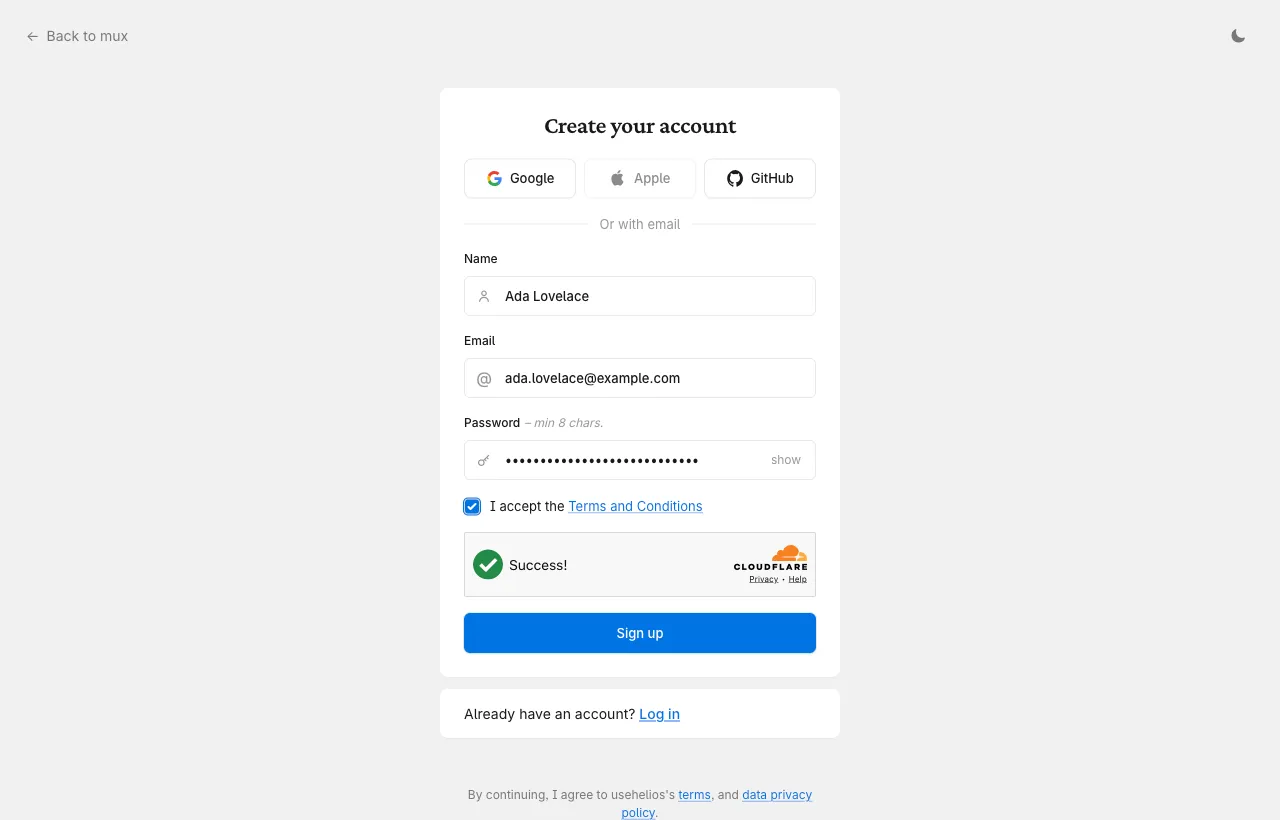
1. Create your account
Section titled “1. Create your account”Open Create an account. Sign up with Google or GitHub, or with a name, an email and a password. Accept the terms, wait for the Cloudflare check to show Success!, then press Sign up.
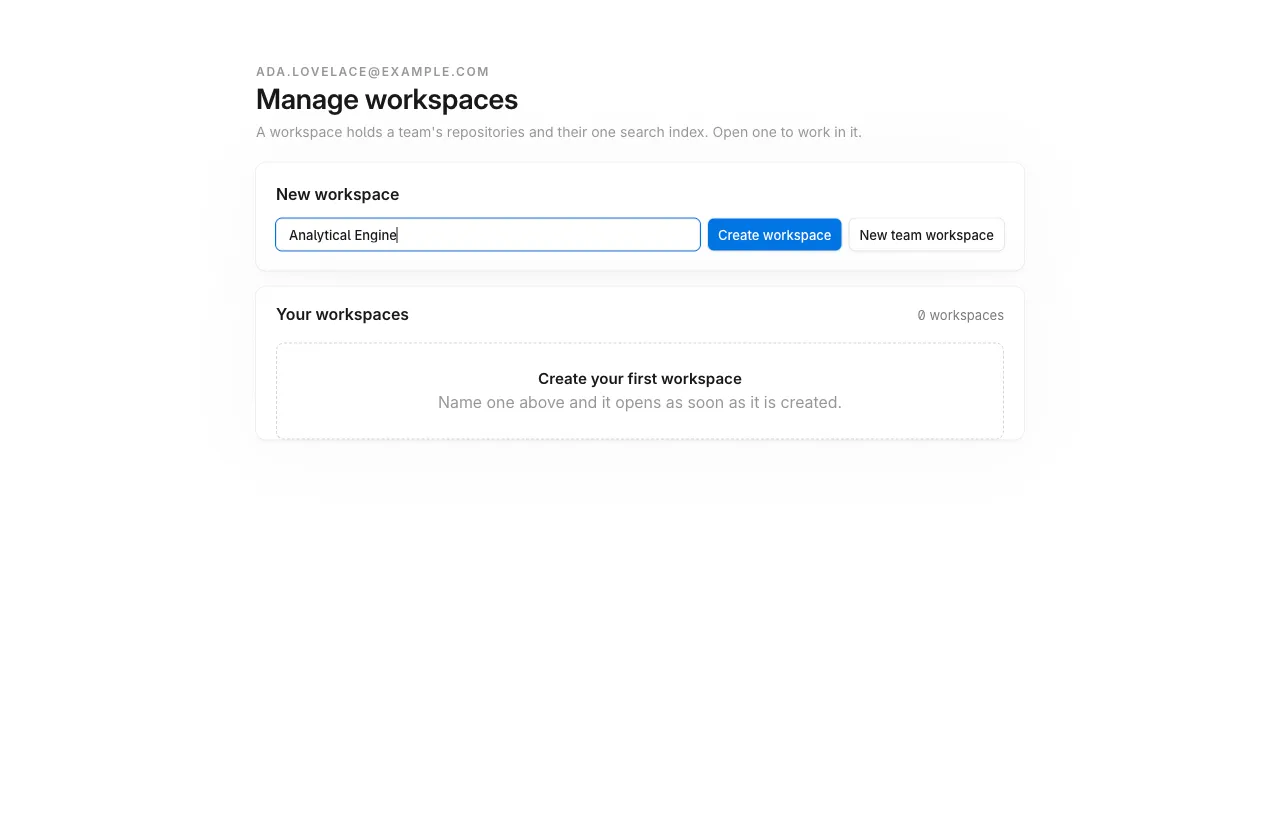
2. Name your first workspace
Section titled “2. Name your first workspace”A workspace holds your team’s repositories and their one search index. Name it and press Create workspace. Hobby includes one workspace.
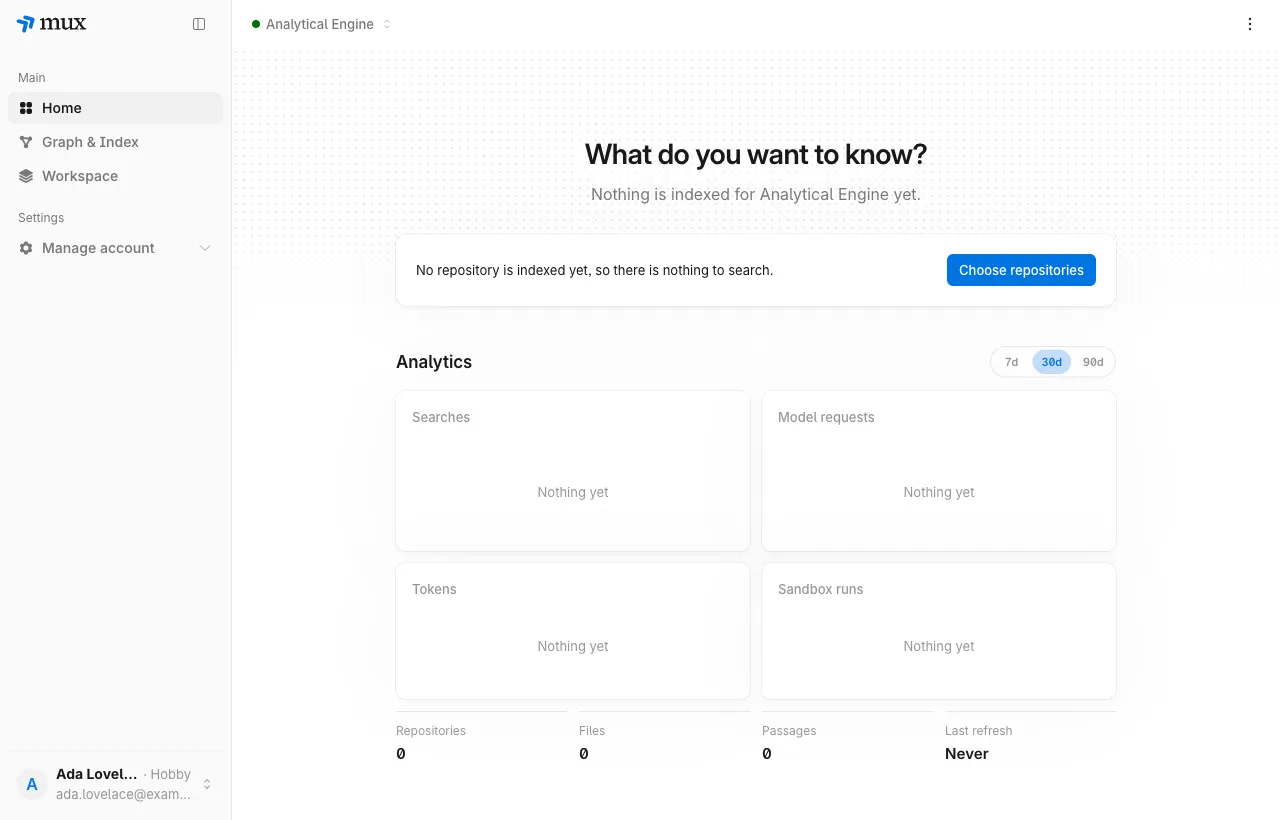
3. Home, before anything is indexed
Section titled “3. Home, before anything is indexed”Home is where you search. Until a repository is indexed it says so and sends you to Choose repositories. The plan shows beside your name, bottom left.
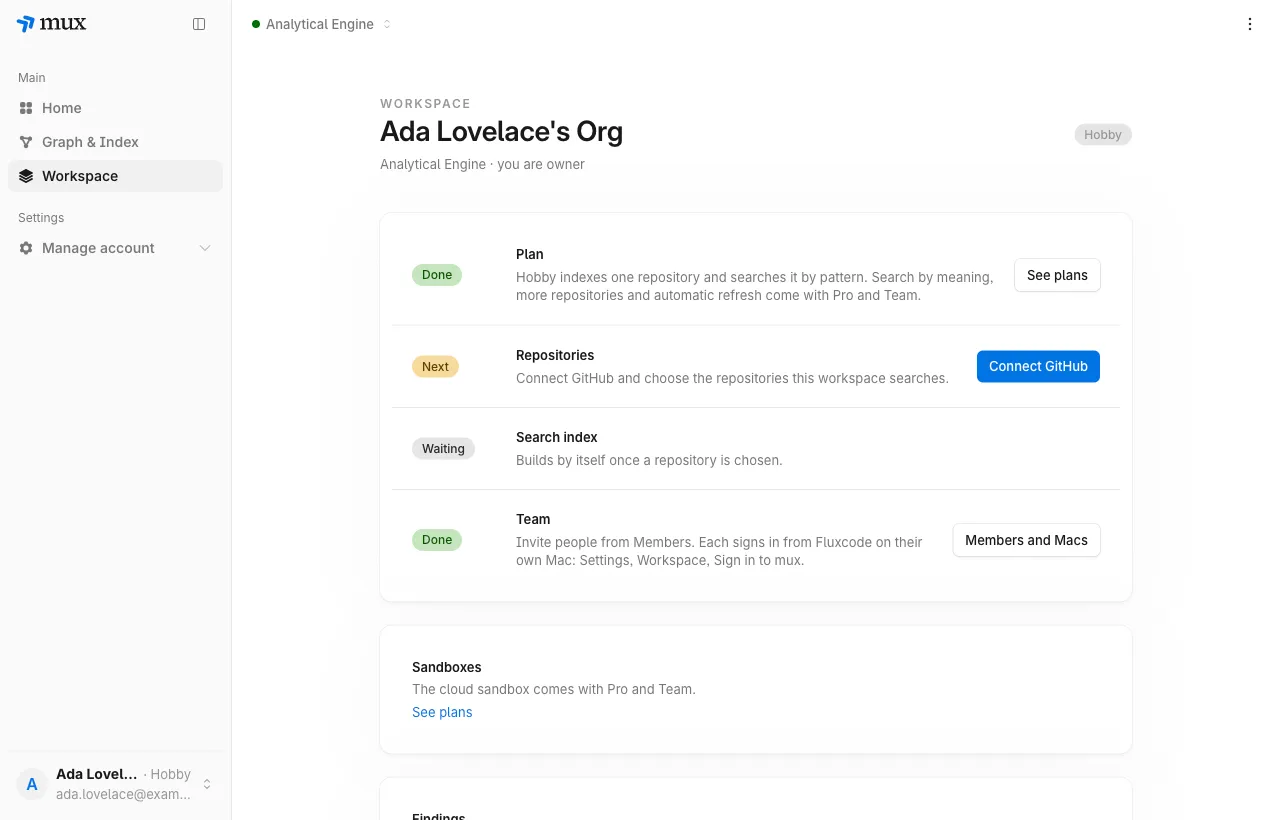
4. The Workspace page lists what is left
Section titled “4. The Workspace page lists what is left”Workspace shows your plan, then each setup step and whether it is done, next, or waiting. The next one is Connect GitHub.
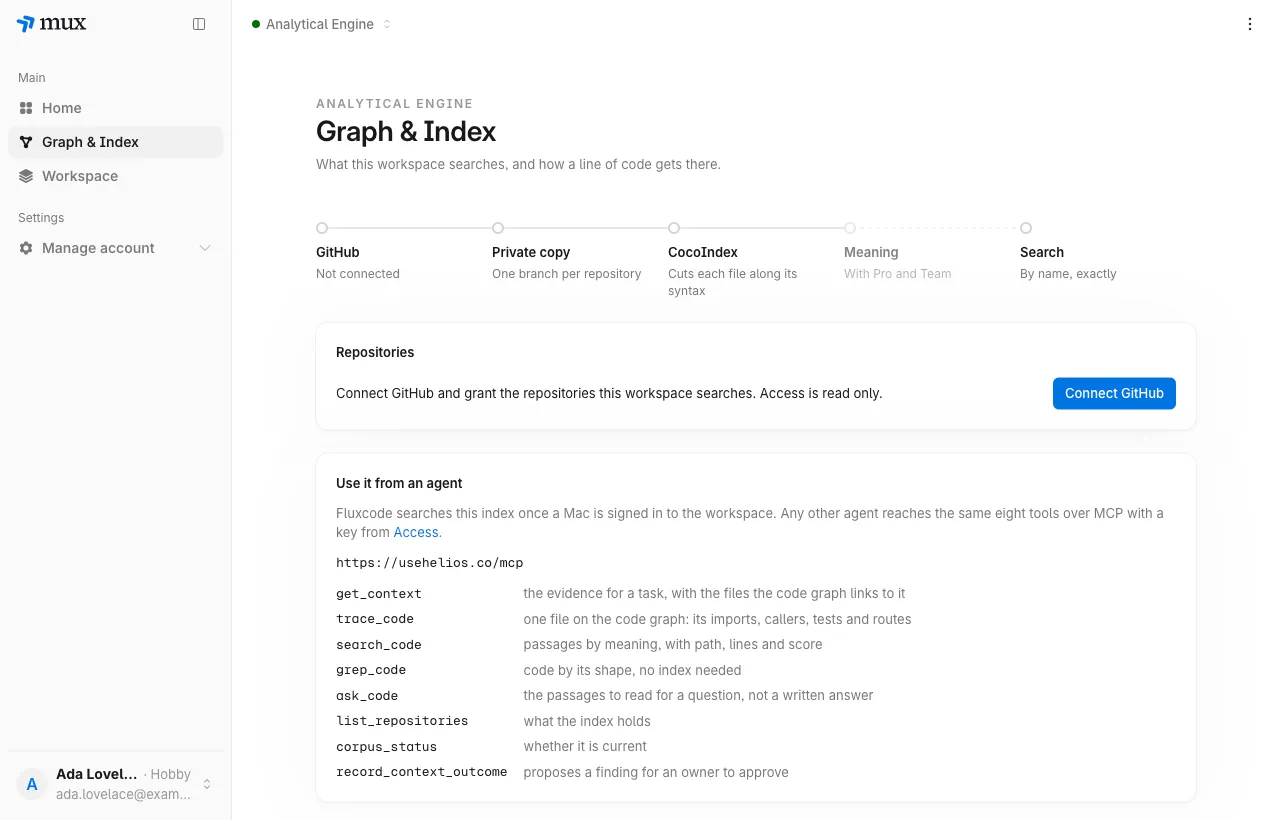
5. Connect GitHub
Section titled “5. Connect GitHub”Open Graph & Index and press Connect GitHub. mux reads only the repositories you grant, and never writes to them. The same page lists the eight tools an agent reaches over MCP.
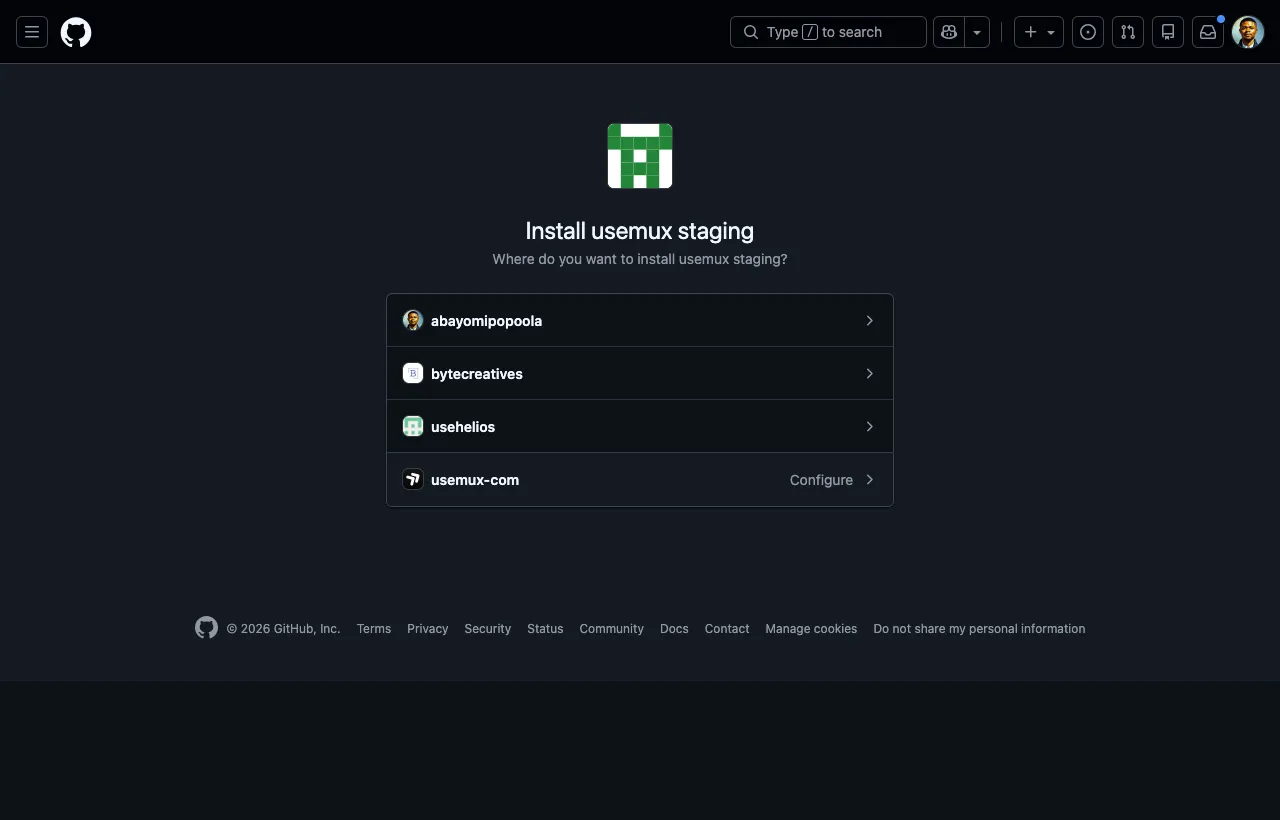
6. Choose where to install the app
Section titled “6. Choose where to install the app”GitHub asks which account or organization gets the mux app. Choose the one that owns the code. An account where the app is already installed says Configure instead.
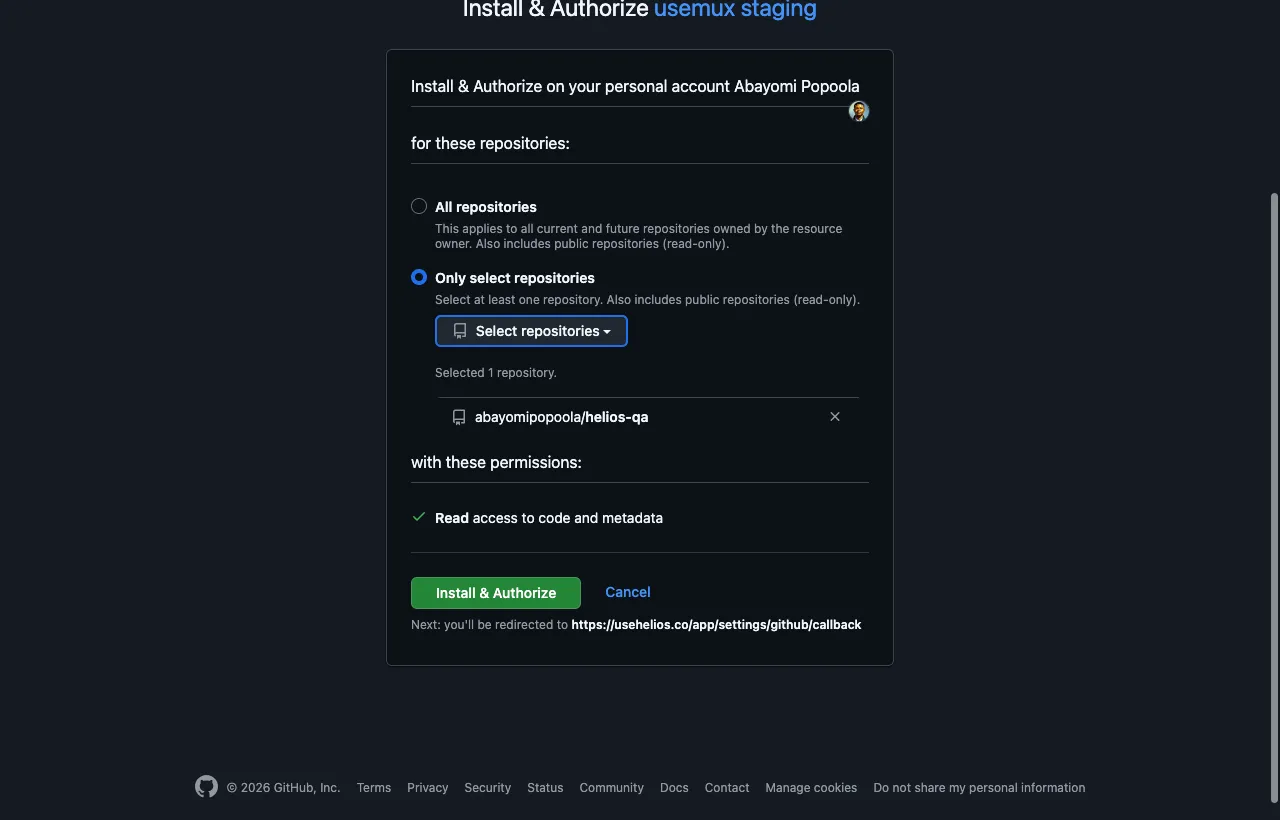
7. Grant only the repositories you want
Section titled “7. Grant only the repositories you want”Choose Only select repositories and pick the repository. The app asks for read access to code and metadata, nothing more. Press Install & Authorize; GitHub sends you back to mux.
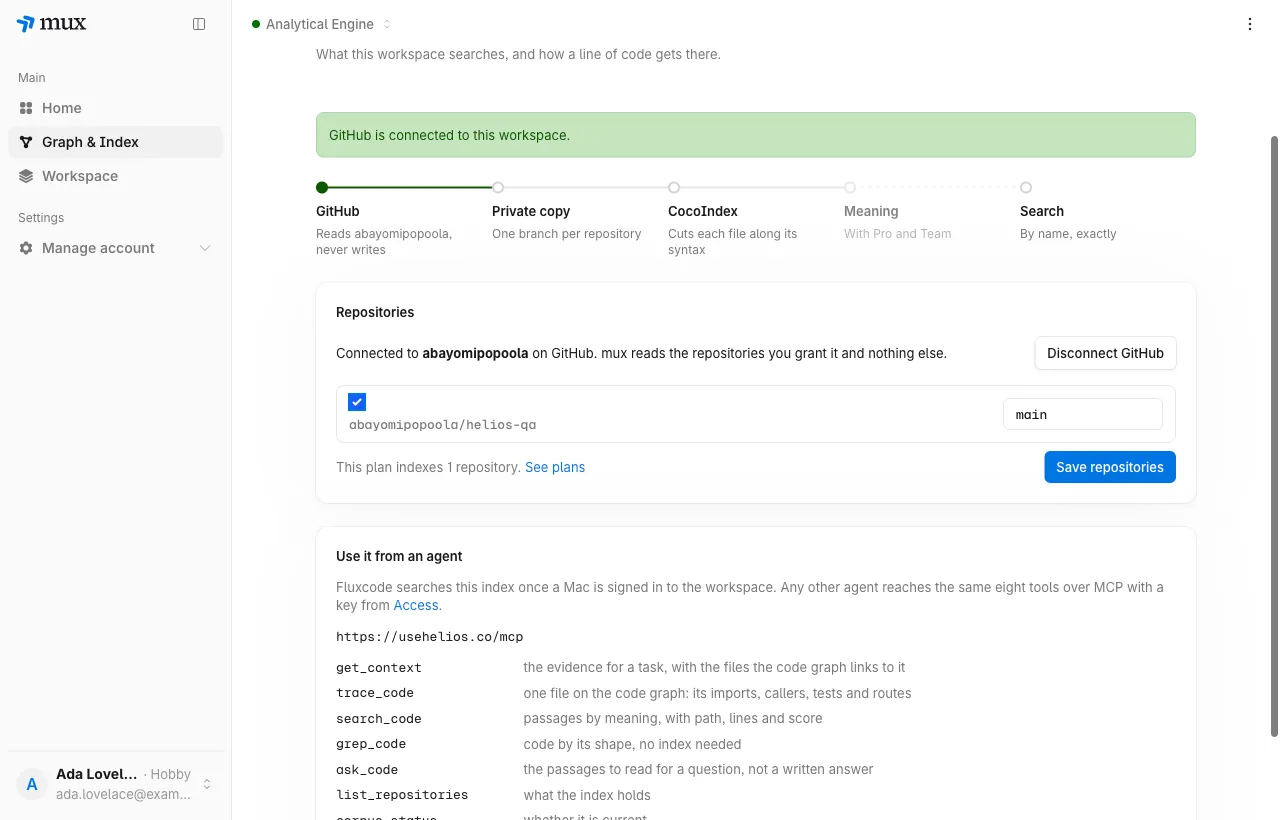
8. Choose the repository to index
Section titled “8. Choose the repository to index”Back in mux, tick the repository, keep the default branch or name another, and press Save repositories. Hobby indexes one repository; Pro indexes twenty and Pro+ fifty.
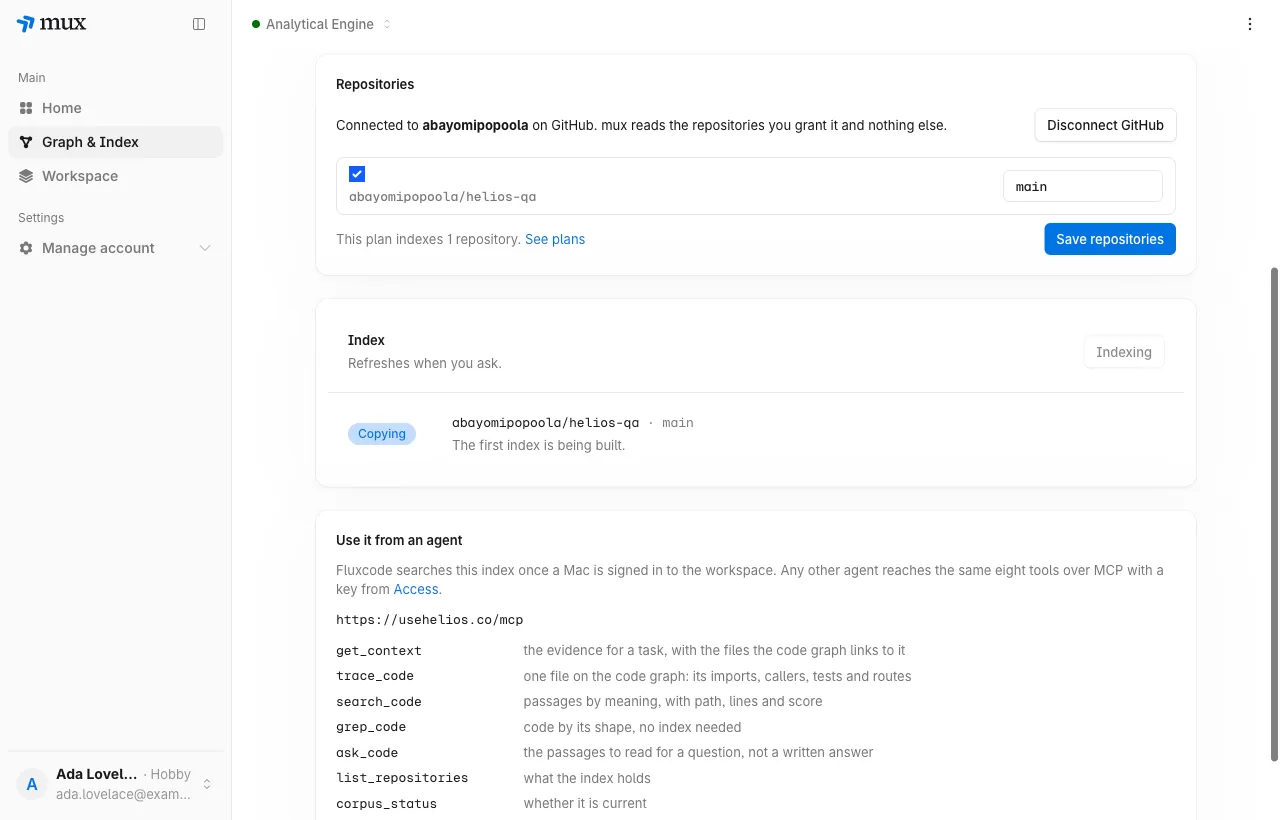
9. Watch the first index build
Section titled “9. Watch the first index build”The repository is copied, then its files are cut along their syntax. The row says Copying while it works.
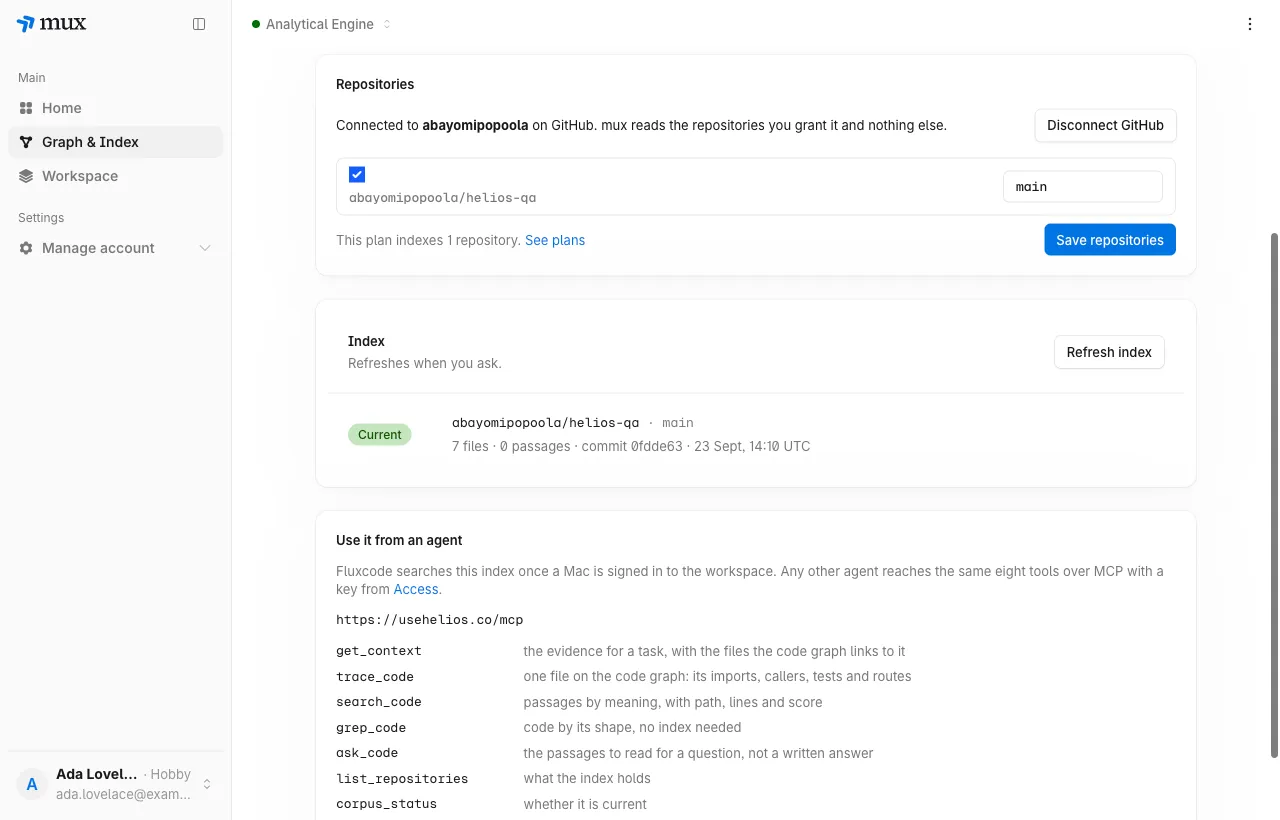
When it is done the row says Current, with the file count and the commit it read. On Hobby, Refresh index brings in new commits when you ask; Pro and Team refresh on every push. If GitHub turns a read away for a moment, mux tries again by itself.
10. Search from Home
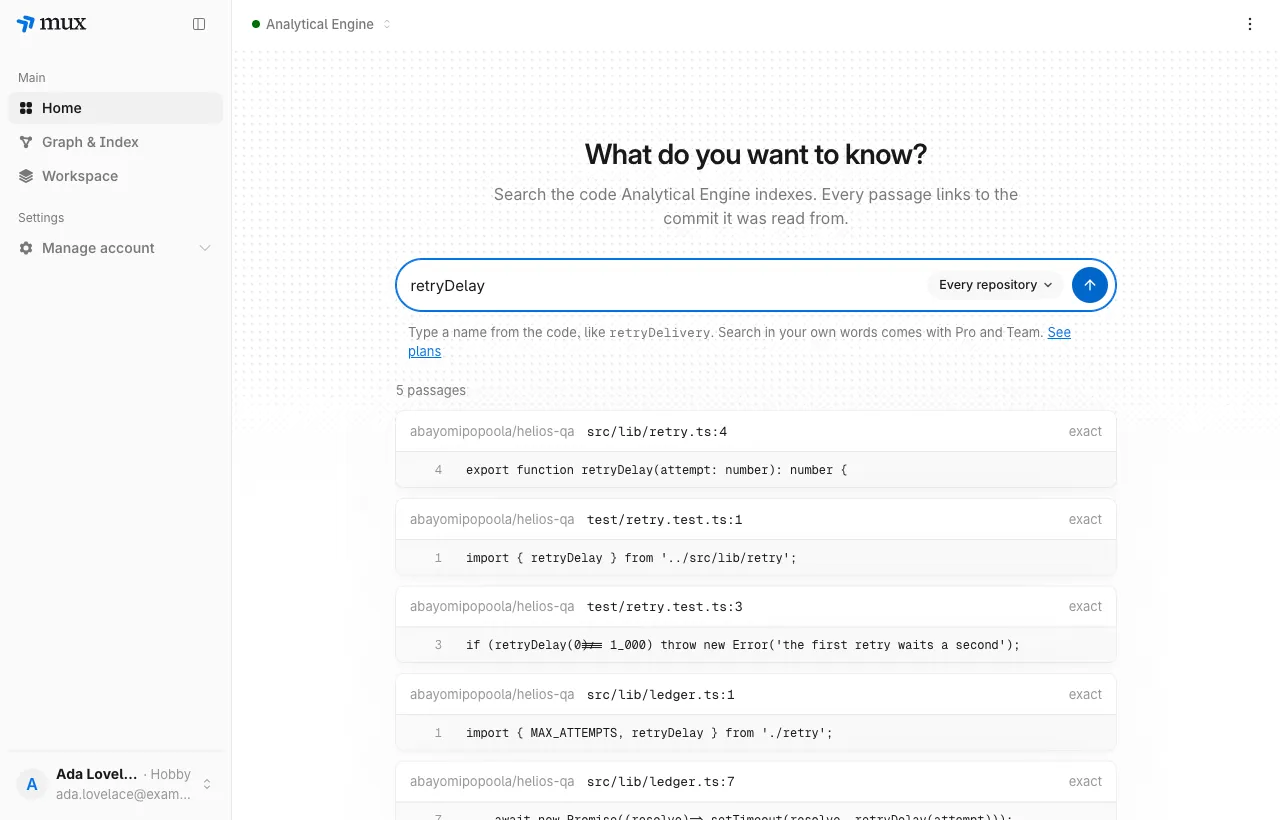
Section titled “10. Search from Home”Type a name from the code. On Hobby the box matches names exactly; on Pro and Team you can also ask in your own words. Every passage names the repository, the file and the line, and links to the commit it was read from.
11. Mint a key for your agent
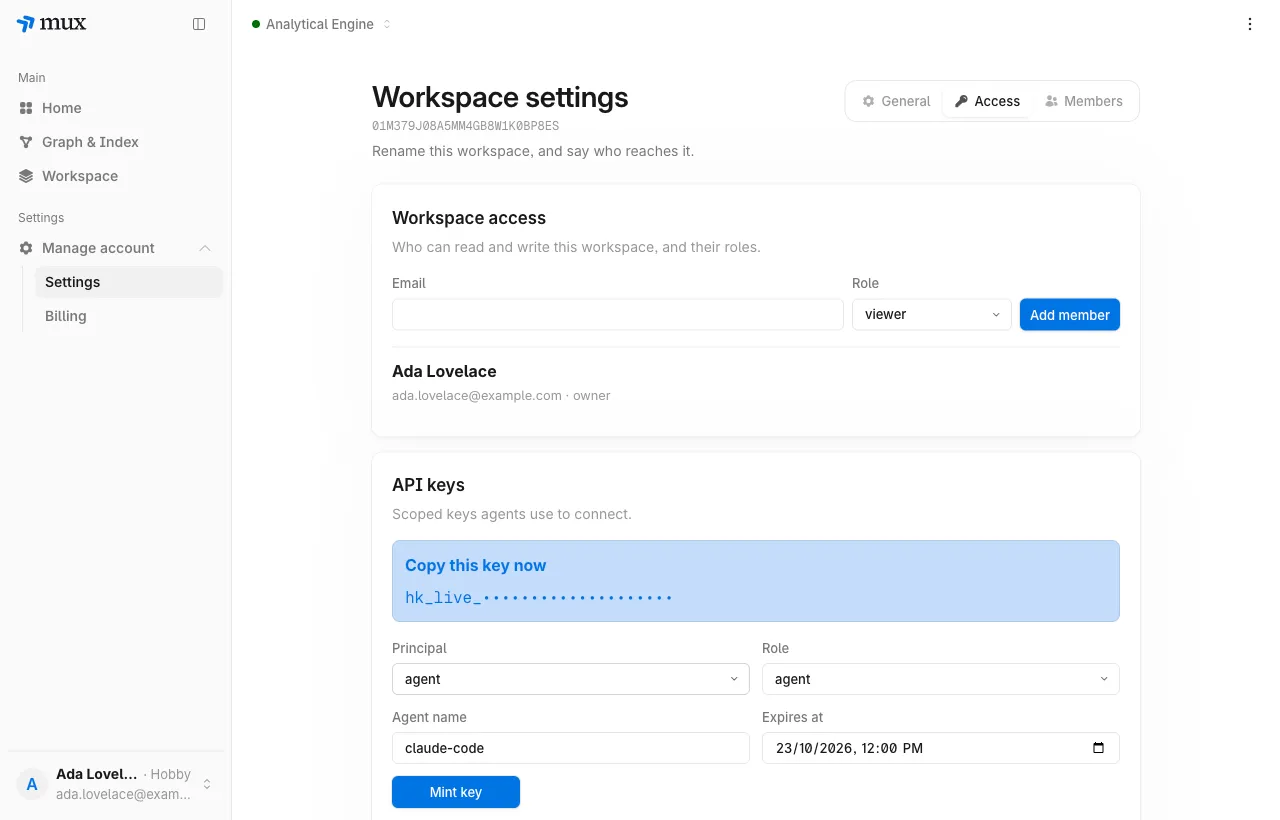
Section titled “11. Mint a key for your agent”Open Manage account → Settings → Access. Under API keys, keep principal and role as agent, name the key after the tool that will use it, set an expiry, and press Mint key. Copy the key at once: mux shows it only this one time. It is hidden here.
12. Connect your agent
Section titled “12. Connect your agent”Give the key to your agent as a Bearer token for https://usemux.com/mcp.
For Claude Code, put the variable, not the key, in .mcp.json:
{ "mcpServers": { "mux": { "type": "http", "url": "https://usemux.com/mcp", "headers": { "Authorization": "Bearer ${MUX_API_KEY}" } } }}The MCP guide covers Codex, Claude Code and GitHub Copilot CLI. muxcode signs in from its own window instead; no key is copied by hand.
An agent starts a task with get_context: one packet of evidence tied to the
indexed commit, with the files the code graph links to it. When it learns
something worth keeping, it proposes a finding with record_context_outcome,
naming the files the finding rests on.
13. Review what your agent proposes
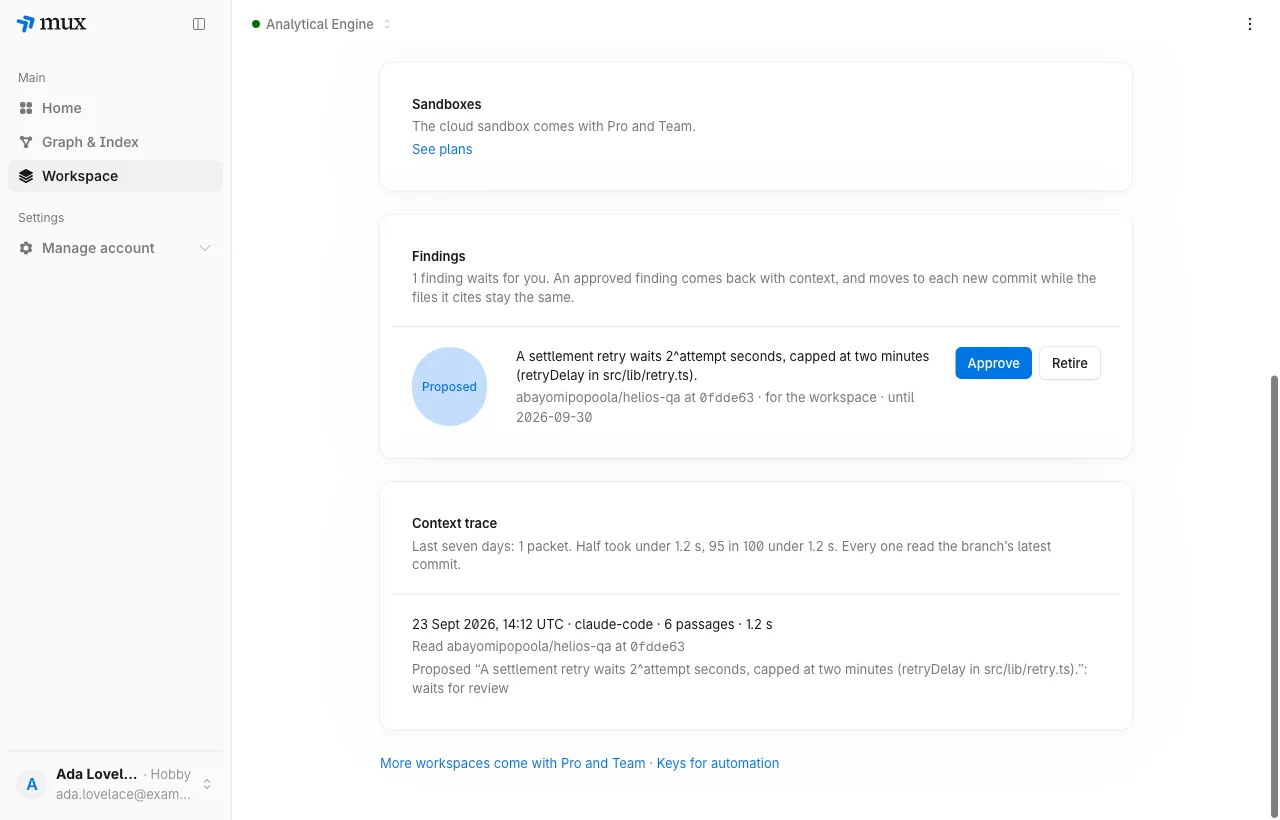
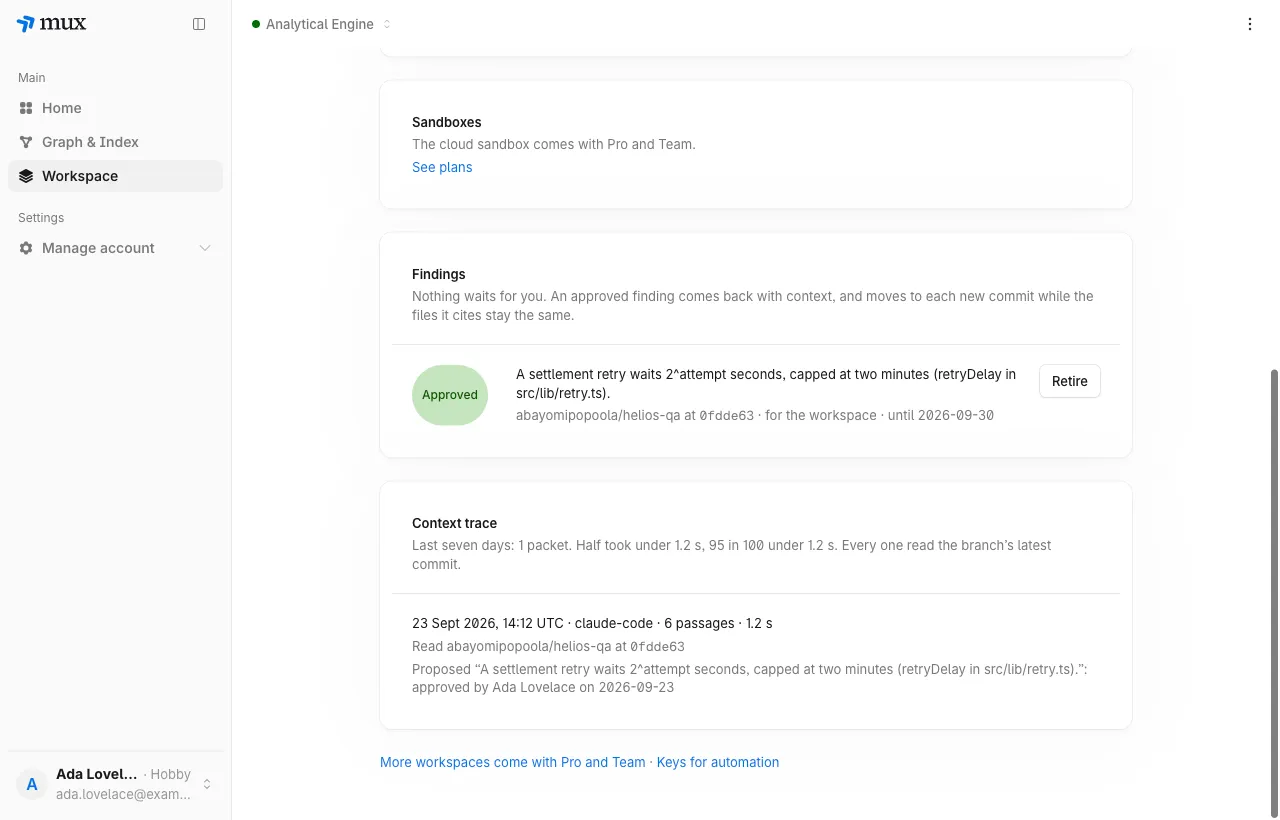
Section titled “13. Review what your agent proposes”A proposed finding waits on the Workspace page for an owner. Nothing reaches another agent until you press Approve. An approved finding comes back with every packet, and moves to each new commit while the files it cites stay the same. Retire takes it out.
14. See how context was used
Section titled “14. See how context was used”Context trace, on the same page, lists each packet: when, which key asked, how many passages, how long it took, which commit it read, and what became of the findings proposed from it. The line on top is the week’s speed.
- Getting started: pattern search, search by meaning, and plan limits.
- muxcode: advanced guide: get the most out of the desktop app.
- MCP guide: every tool and its arguments.
- API reference: the same operations over HTTP.